


Archive for 2013
Adobe Photoshop 7.0 full version Free Download

Hy today i am giving you one most Power full Software. You can use this in Photo Making,Photo Finishing, website Designing,wallpaper Making and much more. Adobe Photoshop 7.0 software, the professional image-editing standard, helps you work more efficiently, explore new creative options, and produce the highest quality images for print, the Web, and anywhere else. Create exceptional imagery with easier access to file data; streamlined Web design; FASTER, professional-quality photo retouching; and more.adobe distiller 7.0 Adobe Photoshop 7.0 helps you stay competitive with innovative tools that deliver new ways to express your creativity and work efficiently. With Photoshop 7.0, you can more easily produce exceptional
imagery for print, the Web, wireless devices, and other media. Photoshop 7.0 rounds out its comprehensive toolset with new capabilities to meet any creative or production demand and to handle the widest variety of image-editing tasks in the most efficient way. With enhanced Web features, you can instantly make Web page elements transparent simply by knocking out one or more colors; create dithered transparencies; manage Web page rollovers and animations; and create more sophisticated Web rollovers. Powerful new tools help you explore your creativity without limits so you can more easily meet the Multimedia demands of today's market. Simulate traditional painting techniques (including pastels and charcoal) with dry and wet brush effects and much more...
Adobe Photoshop Finishing and color adjustment Plug ins
I have Adobe Photoshop finishing and color adjustment Plug ins.Adobe Finishing Plugin is very important for adobe Photoshop. Its Make Photo Finishing very Easy and wonderful. Only you start this and your Photo Finishing is Complete.
How To Install Adobe Photoshop Plugins.
First You Extract This Plug Ins and copy This Plugins and go to C:/ Drive =Program= Adobe Photoshop= Plugins= Filters ,And Past This Plugins into Filters Folder. Then Your Adobe Photoshop Plugins is Installed.
Free Download Adobe Photoshop 7.0 Registered (Click Down)


Free Download Adobe Photoshop Finishing and color adjustment Plug ins (Click Down)
How to Remove Facebook Timeline

This method for removing Timeline only applied to those who enabled it before its public release. Now that the Timeline is being rolled out to everyone, there is no official way to remove it and revert back to the old profile. However, there are a few workarounds. A Chrome extension was recently released that hides the Timeline, so people who use the Chrome Web browser can follow these instructions. There is now an add-on for Firefox that does the same thing.
For the rest of you, we put together this roundup of ideas for making the most out of Facebook Timeline.
When Facebook Timeline was announced, it didn't take long for the Internet to figure out that even though the new profile design isn't yet available to the public, anyone could get it immediately with this little hack.
Today, over 1.5 million users have activated Timeline with this workaround, making the new profile visible to each of them and anyone else who has enabled it.
Eventually, Facebook will mandate Timeline for everyone, and when that happens, expect a lot of backlash. Many people, even those who opted in to the new design, seriously dislike it. They're calling it narcissistic, cluttered, and creepy.
If you concur, and you were one of those people who enabled Timeline, there's still a way to enjoy the old profile design (while it lasts.)
Step 1: Head to the Facebook Developers page where you originally created an app to enable Timeline. Click "Edit app."
.jpg)
Step 2: The only way to remove Timeline is to delete the app. If you are an actual developer, you're out of luck. Otherwise, click "Delete app" in the left sidebar.
.jpg)
.jpg)
Once you confirm the app deletion, your Facebook Timeline will be disabled.
ENJOY :D
How to Remove Autorun virus from Hard Disk
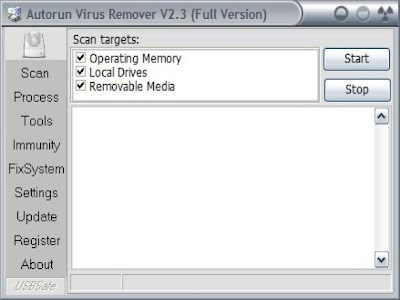
Hy My Name is Usama Maqbool and today i will tell you how to Remove Autorun Virus from your Computer Hard Disk.
So Follow Me Setup by Setup.
METHOD 1.
- First of all click on start Button and open Run.Type in Run "CMD" press Enter.
- Type "cd\" and press enter to get to the root directory of c:\.
- Type "attrib -h -r -s autorun.inf" and press enter.
- Type "del autorun.inf" and press enter.
- Repeat the same process with other drives, type "d:" and do the same thing. then next "e:".and restart your computer.
- Restart your computer and it's done. Enjoy the freedom to open hard drives on a double click.
METHOD 2.
- Go to any folder.In that on the top menu go to Tools--> Folder Options, which will be beside File, Edit, View, Favourites.
- A window pops up after you click on folder options.In that window go to View tab and select the option Show hidden files and folders.Now uncheck the option Hide protected Operating system files.Click Ok
- Now Open your drives (By right click and select Explore. Don't double click!) Delete autorun.inf and MS32DLL.dll.vbs or MS32DLL.dll (use Shift+Delete as it deletes files forever.) in all drives include Handy Drive and Floppy disk.
- Open folder C:\WINDOWS to delete MS32DLL.dll.vbs or MS32DLL.dll (Use Shift+Delete )
- Go to start --> Run --> Regedit and the Registry editor will open
- Now navigate in the left pane as follows: HKEY_LOCAL_MACHINE --> Software --> Microsoft --> Windows --> Current Version --> Run .Now delete the entry MS32DLL (Use Delete key on keyboard)
- Go to HKEY_CURRENT_USER --> Software --> Microsoft --> Internet Explorer --> Main and delete the entry Window Title “Hacked by Godzilla”
- Now open the group policy editor by typing gpedit.msc in Start --> run and pressing enter.
- Go to User Configuration --> Administrative Templates --> System . Double Click on entry Turn Off Autoplay then Turn Off Autoplay Properties will display.Do as follows: Select Enabled Select All drives Click OK
- Go to startup tab in it and uncheck MS32DLL .Now click Ok and when the system configuration utility asks for restart ,click on exit without restart.
- Now go to Tools --> Folder Options on the top menu of some folder again and select the Do not show Hidden files and check Hide operating system files.
- Go to your recyclable bin and empty it to prevent any possiblity of MS322DLL.dll.vbs lying there.
- Now restart your PC once and you can now open your hard disk drives by double clicking on them
TIPS:
- Sometimes "cmd prompt" returns an error "file not found autorun.inf, sometimes some of your hard drives might not be containing the autorun.inf file, so leave those drives and try the next ones.
WARNINGS:
- After deleting the file from all of your hard drives, immediately restart your computer. Don't try to open your drives by double clicking before restarting the machine otherwise you'll have to repeat whole of the procedure again.
How to Remove BOOT SECTOR Virus From Hard Disk

Hy Friends today i am going to show you how to REMOVE BOOT SECTOR From your HARD DISK.
So Follow me Setup by Setup.
Has your computer been acting strange lately? Has it been running slow, or telling you that your computer needs a certain program? If so it may have a virus. This article deals with ones called Boot Sector Viruses. These reside in the sectors that are used to start your Operating System. A
simple operating system replacement may leave the virus to continue its evil ways.
Follow These Setups:
- Remove any important files and shut down the infected computer. You can not begin to remove the virus if it is in the RAM in your computer.
- Option 1: Take the drive to a pro. UNPLUG the computer, and all monitors, etc. Remove the HDD (hard disk drive or hard drive) from the infected computer. Be sure to remove all of the static electricity from your self by touching the metal case.
- Option 2: use software on CD-rom or floppy (yes, can still download as floppy image) to scan the drive and fix the MBR. Start with the O.S. Install CD. Windows Recovery Console option if is Windows.
- To change the Boot Order: Enter BIOS via appropriate startup key for your computer. When the BIOS setup page shows, set the CD or Floppy drive to boot first.
- Sources of that software: Find out which company manufactures your HDD and see if they have a utility that will do a Low-Level format. This part is important because it deletes everything from your hard drive so that no one can get it back, including the virus. Some common HDD manufacturers' tools for doing this can be found here.
- Run the formatting utility provided by your HDD manufacturer.
- If have errors booting the O.S., reinstall your Operating System of choice however you want to.
- And the most important thing is that you use trusted software to remove the virus or else you will be in more trouble (if that software is infected). Some software will show many virus 'hits' in order to sell the full version, so read reviews first.
TIPS:
- A bootable floppy is NOT required, just a formatted floppy. Check to see if your floppy is formatted for Mac or PC on the label. If required, in MS Windows, go to My Computer, right click on your floppy drive, click "Format...",etc. Then run the downloaded hard-drive floppy image installer. A CD image will require burning software.
- If you feel uncomfortable completing any of the steps, take your computer in to a specialist.
WARNINGS:
- Be sure to write protect the floppy after writing using the sliding tab, because any virus that is residing in the boot sector of your HDD may copy itself.
- A Low-Level format will erase anything and everything on your HDD. It does this because it erases the whole disk, and not just the File Allocation Table (FAT) which is the directory for the hard drive. Its kind of like a telephone directory. When you delete things or do a format in Windows or DOS, known as a High-Level format, it tells the FAT that there is nothing there anymore, but leaves the data on the disk. A Low-Level format or delete tells the FAT that there is nothing there and then rewrites the sectors on the HDD where the file was. Because of this there is no possible way to get your data back after this process is complete.
Free Download Google Chrome Fast Install
Google takes aim squarely at Microsoft with the release of its new Web browser, Chrome. And Microsoft should be very afraid: Chrome lives up to its hype by rethinking the Web browser in clever and convenient ways that make using the Web a more organic experience than you'd get with either Microsoft's Internet Explorer 8 or Mozilla's Firefox 3.
Initially available for download for Windows Vista and XP, Google plans to expand its Chrome offerings to the Mac and Linux platforms as well. The company doesn't offer any timeline for these versions, though. (For additional PCWorld.com coverage of Google's new browser, see " Chrome vs. the World" and " Google's
Chrome: 7 Reasons for It and 7 Reasons Against It.")
Chrome automatically detects the Web browser you're using and prompts you through the process of installation (right down to telling you how to access downloaded files within Firefox, for example). When you first run the application, Chrome imports your bookmarks, passwords, and settings from Firefox or Internet Explorer. It even can grab username and password data, and it automatically populates those fields for you when you use Chrome for the first time to visit a particular site.
After running through a quick import checklist, Chrome opens on your desktop--and right away you begin to experience the Web in a new way. Chrome's layout is very simple: You'll see a row of tabs running along the top, a Web address bar, and a bookmarks bar that runs beneath the address bar. A separate recent bookmarks box appears at the right of the screen, as does a history search field.
Like its Google stablemates, Chrome has a remarkably minimalist interface. There is no full-scale menu bar and no title bar--and few distractions. All controls are buried beneath two icons to the right of the Omnibar (as Google refers to its address bar): a page icon for managing tabs and using Google Gears to create application-like shortcuts from your desktop to a Web site; and a wrench for history, downloads, and other browser options.
You can set your own home page, or you can use the 'most visited' sites page as your starting point. This page provides thumbnail images of your most frequently visited sites, shows recent bookmarks, and supplies a search field for searching your page history. You can change your default search engine, too: This option is located beneath the wrench icon, under Options .
Chrome's design bridges the gap between desktop and so-called "cloud computing." At the touch of a button, Chrome lets you make a desktop, Start menu, or QuickLaunch shortcut to any Web page or Web application, blurring the line between what's online and what's inside your PC. For example, I created a desktop shortcut for Google Maps. When you create a shortcut for a Web application, Chrome strips away all of the toolbars and tabs from the window, leaving you with something that feels much more like a desktop application than like a Web application or page. The lack of forward and back buttons means that if you browse between pages in a saved Web application you may find yourself a little confused if you want to go back a page. Chrome does let you right-click to navigate backward, however.
This being Google, search is an integral part of Chrome; and Google has added some clever features to make searching easier. Chrome goes beyond its Microsoft and Mozilla competition by searching your browser history's page titles as well page content. The history results show the title of the page, as well as a thumbnail representation of the page (for some sites but not all; it was unclear why some sites were visually represented while others were not), but it doesn't show the actual Web page address. The lack of URL information can make it difficult to identify the specific Web page you're going to, especially if the site's title bar description is not specific (because, say, different sections of the same site have identical title bar descriptors).
For example, earlier today I read an article on Macworld about an upcoming Apple launch event. To find the article in my browser history, I simply typed 'apple event' in the Omnibar. The resulting list showed every page I had visited that contained the phrase 'apple event'. Conveniently, the Omnibar lets you search not just your history, but Google and other sites as well.
The default search engine is Google, as you might expect. However, you can choose from a list of nine other search engines, or you can manually add your own search engine. Type 'google fish sticks' to search for fish sticks on Google. The same syntax works for Yahoo, Amazon, Live Search, and other sites that are already recognized by Google or that you add. This feature, though nifty and promising, proved inconsistent in the early going: It worked for me most of the time on a Windows Vista PC, but two of my colleagues who were testing Chrome on Windows XP machines had trouble getting the feature to work. Google provides keywords to activate this search feature, but some of us had to edit the search engine keywords manually before the feature would function properly.
Chrome includes a number of features that appear in other browsers, such as a private browsing mode dubbed Incognito, tools for Web developers to use in viewing and troubleshooting source code, and the ability to restore all tabs from a previous session. Chrome also features tab isolation: If a Web page causes a problem with Chrome and leads to a crash, the crash will affect only the tab displaying the page and not the whole program. Internet Explorer 8 will offer a similar feature, but Chrome takes the idea a step further by adding a task manager that gives the user an idea of how much memory and CPU use a page is eating up, and by allowing you to kill anything that is causing a problem. Unfortunately, you have to configure this tool manually.
In my early testing, I ran into some problems. Chrome can be a little unstable, which is not surprising considering that it is a beta. Also, I have found that Flash does not work with Chrome on my Vista-based system, though my two colleagues running XP had no issues with Flash compatibility. They did, however, experience software crashes when searching in the history section. And when Chrome crashes, it takes everything with it unless you manually configure the browser to act otherwise (the configuration options are buried under the wrench icon, in the Options/Basics menu). In contrast, Mozilla Firefox and Microsoft Internet Explorer 8 automatically restore your previous session in the event of a crash.
The sites I visited that rely on JavaScript and Ajax seemed to work fine, but Microsoft's Silverlight wouldn't work with Chrome. Google's browser uses WebKit, the same engine that powers Apple's Safari Web browser--and Silverlight works with Safari for Mac only.
How to Chang Yahoo Password

Hy Friends, Today i am telling you how to Chang your Yahoo Password with Simpel Methed. It is very simpel and easy.Now Follow me Setup by Setup.
To update your Yahoo! Mail password:
Setup No 1.
- Click your name in Yahoo! Mail's top row and select Account Info from the menu that comes up.
- Type your Yahoo! Mail password under Password.
- Click Sign In.
- Follow the Change your password link under Sign-In and Security.
- Type your old Yahoo! Mail password under Enter your Current Password:.
- Now enter the desired new password under both Choose a New Password: and Confirm your New Password:.
- Ideally, the password is both secure and easy to remember. Change it frequently — just like now; congratulations! — to help protect your Yahoo! Mail account from unwarranted access.
- Click Save.
How to Lock down USB drives in Windows with USB Disk Manager
USB drives are convenient for storage and for transferring data to other computers. This convenience also makes them a great delivery system for malware. If you're comfortable with the Windows Registry or know how to set Group Policies, you can lock down your PC's USB drives. A much simpler way is by using USB Disk Manager.
USB Disk Manager is a small Windows program that can help you manage the permissions of USB drives. The portable app doesn't need to be installed and can be run from a folder on your hard drive or from a USB flash drive. Once you launch USB Disk Manager, you'll see four options in the left pane.
Write protect
Turning write protect on prevents any new data from being written to USB disks (portable hard drive or flash drive). This a nice way to keep any viruses that might be on your PC from attaching to the USB drive. It also keeps others from transferring files off of your PC, which could be useful if you're getting your laptop repaired and want to discourage a nosy technician from copying your data.

Execute deny
Enabling execute deny prevents executables on USB drives from running on your PC, which will prevent the most common viruses from infecting your system.
Disable USB
Disabling USB will keep your system from reading from or writing to USB drives. USB drives won't even show up in Windows. If you don't want others from copying files to or from your system, this is the setting to use.

The last option in USB Disk Manager allows you to turn on some additional settings, like automatically starting the app when Windows starts and disabling Windows Autorun for USB disks.
That's it. Keep in mind that if you already have USB disks plugged into a USB port when you run USB Disk Manager, your changes won't take effect until they're reconnected.
IDM 6.11 Build 8 full version free Download with Patch

nternet Download Manager 6.11 Build 7. Fixed compatibility problems with different browsers including Internet Explorer 9 Final, Mozilla Firefox 4, 5, 6, 7, 8, 9, 10, 11 and Firefox 12, Google Chrome. Improved FLV grabber to save videos from web players on YouTube, Google Video, MySpace TV, and other popular sites.
Internet Download Manager 6.11 Build 7 (IDM) is a tool to increase download speeds by up to 5 times, resume and schedule downloads. Comprehensive error recovery and resume capability will restart broken or interrupted downloads due to lost connections, network problems, computer shutdowns, or unexpected
power outages. Simple graphic user interface makes IDM user friendly and easy to use.Internet Download Manager has a smart download logic accelerator that features intelligent dynamic file segmentation and safe multipart downloading technology to accelerate your downloads. Unlike other download managers and accelerators Internet Download Manager segments downloaded files dynamically during download process and reuses available connections without additional connect and login stages to achieve best acceleration performance.
Internet Download Manager Version 6.11 Build 7 adds IDM download panel for web-players that can be used to download flash videos from sites like YouTube, MySpaceTV, and Google Videos. It also features complete Windows 7 and Vista support, YouTube grabber, redeveloped scheduler, and MMS protocol support. The new version also adds improved integration for IE and IE based browsers, redesigned and enhanced download engine, the unique advanced integration into all latest browsers, improved toolbar, and a wealth of other improvements and new features.
Installation
1. Download and Extract Data
2. Install idman611
3. Close Internet Download Manager in Tray Icon
4. Go to patch Folder and run Patch file
5. Click on Patch Button
6. Select IDM.exe in C:/ > Program files > internet Download Manager.
7. Give him your First Name and Last Name and Click on Ok.
Your IDM Registration is now complete.
Its very simple to install it.First of all you start this setup and Click on NEXT NEXT so and so.After Instillation in one question hit in your mind HOW TO REGISTERED IT so Do not worry i tech you how to Registered it.In folder of internet download manager one more Folder will apeare like this name Creek you go in this and dabble click on IDMan.exe Click on Patch he will say you DO NOT FIND TARGET then you go to where install your idm like C:/ > Program > internet download manager and Selest IDMan.exe and click Ok.and giv your First Name and Last Name and your idm Registration is Complete.Thanks For Reding.
Tag :
IDM,
ICQ Pro 2003b Free Download
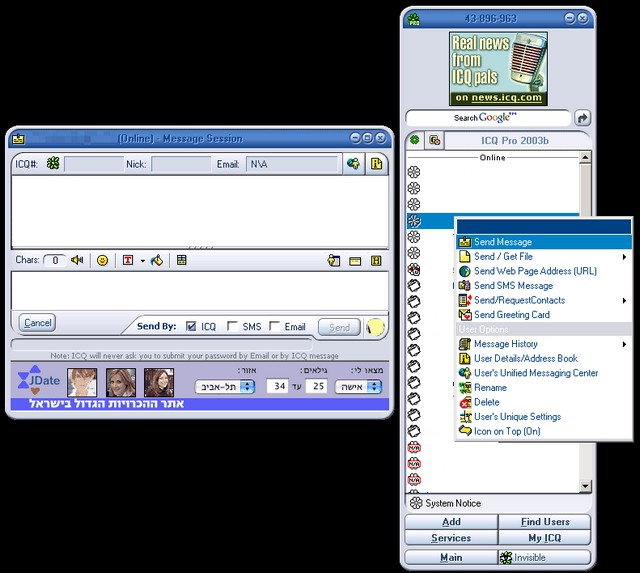
Neue Build-Version des beliebten Instant-Messengers mit Änderungen an der Oberfläche.
Die neue Version 2003b besitzt jetzt eine komplett überarbeitete Standard-Oberfläche, wie sie auch schon in ICQ Lite verwendet wird. Auch die Werbeeinblendungen sind jetzt wieder ein Stück größer.
Wer Freunde im Internet treffen will, der hat ein großes Problem: Versäumt man vereinbarte Termine, so haben sich Ihre Bekannten meist längst schon wieder ausgeloggt. Mit ICQ, der Freeware Buddy-List fürs Internet, wissen Sie künftig auch ohne festen Termin, ob Ihre Kumpels für einen Chat oder ein kurzes Spielchen bereit sind.
ICQ können Sie seit einiger Zeit auch ohne Download nutzen: Die Java-Version ICQ2Go wird direkt im Browser gestartet und bietet alle wichtigen Funktionen.
Windows Server 2008 R2 Enterprise Download
key features of "Windows Server 2008: · A rock-solid server foundation that is secure, manageable, responsive, interoperable, and compatible
· A platform that supports rapid development and delivery of smart and connected applications
· Agility, to increase operational efficiency and IT effectiveness
· Policy-based networking, improved branch management, and enhanced end-user collaboration
· An application platform that provides flexible solutions, connected systems, and rich user experiences
· A platform that provides a more secure and reliable IT infrastructure, to help organizations meet project objectives on time and within budget, allowing staff to focus on priorities important to the company
Requirements:
· Single processor with 1.4 GHz (x64 processor) or 1.3GHz (Dual Core)
· Minimum 512 MB RAM
· Display: Super VGA (800 × 600) or higher resolution monitor
How to manually rearm the 10 day activation grace period
When the initial 10-day activation period nears its end, you can run the Slmgr.vbs script to reset it back to 10 days. To do this, follow these steps:
1. Click Start, and then click Command Prompt.
2. Type slmgr.vbs -dli, and then press ENTER to check the current status of your activation period.
3. To reset the activation period, type slmgr.vbs –rearm, and then press ENTER.
4. Restart the computer.
Click on the link
Wait for five seconds and then click on
· A platform that supports rapid development and delivery of smart and connected applications
· Agility, to increase operational efficiency and IT effectiveness
· Policy-based networking, improved branch management, and enhanced end-user collaboration
· An application platform that provides flexible solutions, connected systems, and rich user experiences
· A platform that provides a more secure and reliable IT infrastructure, to help organizations meet project objectives on time and within budget, allowing staff to focus on priorities important to the company
Requirements:
· Single processor with 1.4 GHz (x64 processor) or 1.3GHz (Dual Core)
· Minimum 512 MB RAM
· Display: Super VGA (800 × 600) or higher resolution monitor
How to manually rearm the 10 day activation grace period
When the initial 10-day activation period nears its end, you can run the Slmgr.vbs script to reset it back to 10 days. To do this, follow these steps:
1. Click Start, and then click Command Prompt.
2. Type slmgr.vbs -dli, and then press ENTER to check the current status of your activation period.
3. To reset the activation period, type slmgr.vbs –rearm, and then press ENTER.
4. Restart the computer.
Click Here To Download Windows Server 2008 R2 x64 Bit Download
Window 7 And 2008 Activater..(Work For Both)
Learn How to Download:-Window 7 And 2008 Activater..(Work For Both)
Click on the link
Wait for five seconds and then click on
Windows Server 2012 Enterprise Download
Windows Server 2012 is the latest iteration of the operating system that powers datacenters all around the world and is employed by businesses or organizations to take full advantage of the unique value it provides.
Windows Server 2012 takes everything one step further and will enable you to harness the power of several servers from a single multiserver platform with cloud integration and providing a modern, flexible workstyle.
Requirements:
· Minimum: 1.4 GHz 64-bit processor
· Minimum: 512 MB RAM
· Minimum: 32 GB free disk space
· DVD drive
· Super VGA (800 x 600) or higher-resolution monitor
· Keyboard and Microsoft mouse (or other compatible pointing device)
· Internet access
Learn How to Download:-
Click on the link
Wait for five seconds and then click on
Realtek HD Audio Driver 2.69 for Vista x32/Windows 7 x32/Windows 8 x32

Realtek HD Audio Driver 2.69 for Vista x32/Windows 7 x32/Windows 8 x32
Driver Package R2.69
Realtek HD Audio Driver support all of Realtek HD Audio Codec:
1. Vista, Windows 7, Windows 8 WHQL Supporting:
ALC882, ALC883, ALC885, ALC886, ALC887, ALC888, ALC889, ALC892, ALC899, ALC861VD, ALC660, ALC662, ALC663, ALC665, ALC670, ALC671, ALC672, ALC676, ALC680, ALC221, ALC231, ALC260, ALC262, ALC267, ALC268, ALC269, ALC270, ALC272, ALC273, ALC275, ALC276, ALC280, ALC282, ALC283, ALC290
2. Windows 2000/XP WHQL Supporting:
ALC880, ALC882, ALC883, ALC885, ALC886, ALC887, ALC888, ALC889, ALC892, ALC899, ALC861VC, ALC861VD, ALC660, ALC662, ALC663, ALC665, ALC670, ALC671, ALC672, ALC676, ALC680, ALC221, ALC231, ALC260, ALC262, ALC267,ALC268, ALC269, ALC270, ALC272, ALC273, ALC275, ALC276, ALC280, ALC282, ALC283, ALC290
3. HDMI Device WHQL Support: ATI HDMI Devices
4. OS Supporting: Microsoft Windows XP, Windows 2000, Windows Server 2003, Vista, Windows Server 2008, Windows7 - x86/x64
5. Pack with Microsoft High Definition Audio UAAV1.0a(5013) For Windows 2000 SP4, XP SP1, XP SP2, Server 2003 SP1.
6. Add/Fix
1.) Driver :
1. Customizations.
2. Windows 8 WHQLed Driver.
3. Add ALC283
It is highly recommended to always use the most recent driver version available.
Realtek HD Audio Driver 2.69 for Vista x32/Windows 7 x32/Windows 8 x32
Learn How to Download:-
Click on the link
Wait for five seconds and then click on
Realtek HD Audio Driver 2.69 for Vista64/Windows 7 x64/Windows 8 x64
Realtek HD Audio Driver 2.69 for Vista64/Windows 7 x64/Windows 8 x64
Driver Package R2.69
Realtek HD Audio Driver support all of Realtek HD Audio Codec:
1. Vista, Windows 7, Windows 8 WHQL Supporting:
ALC882, ALC883, ALC885, ALC886, ALC887, ALC888, ALC889, ALC892, ALC899, ALC861VD, ALC660, ALC662, ALC663, ALC665, ALC670, ALC671, ALC672, ALC676, ALC680, ALC221, ALC231, ALC260, ALC262, ALC267, ALC268, ALC269, ALC270, ALC272, ALC273, ALC275, ALC276, ALC280, ALC282, ALC283, ALC290
2. Windows 2000/XP WHQL Supporting:
ALC880, ALC882, ALC883, ALC885, ALC886, ALC887, ALC888, ALC889, ALC892, ALC899, ALC861VC, ALC861VD, ALC660, ALC662, ALC663, ALC665, ALC670, ALC671, ALC672, ALC676, ALC680, ALC221, ALC231, ALC260, ALC262, ALC267,ALC268, ALC269, ALC270, ALC272, ALC273, ALC275, ALC276, ALC280, ALC282, ALC283, ALC290
3. HDMI Device WHQL Support: ATI HDMI Devices
4. OS Supporting: Microsoft Windows XP, Windows 2000, Windows Server 2003, Vista, Windows Server 2008, Windows7 - x86/x64
5. Pack with Microsoft High Definition Audio UAAV1.0a(5013) For Windows 2000 SP4, XP SP1, XP SP2, Server 2003 SP1.
6. Add/Fix
1.) Driver :
1. Customizations.
2. Windows 8 WHQLed Driver.
3. Add ALC283
It is highly recommended to always use the most recent driver version available.
Realtek HD Audio Driver 2.69 for Vista64/Windows 7 x64/Windows 8 x64
Learn How to Download:-
Click on the link
Wait for five seconds and then click on
Microsoft Office Professional Plus 2010 x64 Bit Download

Download Microsoft Office description:
Microsoft Office 2010 gives you powerful new tools to express your ideas, solve problems, and connect with people. Office 2010 lets you work how, when, and where you want, letting you get things from a PC, the Web, and even a smartphone.
First Download 30 Day's licensed Microsoft Office..
Click Here to Download Microsoft Office 2010 x64 Bit
Instructions For KeyGen:
1) Install Microsoft Office Professional Plus 2010 as a trial using given keys Below,After that do not run Office.
Trial Keys
Product Key : 72D2Y-R2D7F-HG6TM-H8W4M-CHCB4
2) Download Activator.
Click Here to Download Activator ToolKit
(Or)
3) Download ToolKit Activator.
Click Here to Download Activator ToolKit
3) Unzip the Activator to a directory.
4) Run the Activator..
5) Now, click on Activator, and wait a while until it finishes the process of activation.
6) Enjoy!
Learn How to Download:-
Click on the link
Wait for five seconds and then click on

